Outernet Receiver with a Wifi Grid Antenna
I originally bought most of this hardware for the reception of the HRIT & LRIT signals coming from the NOAA’s GOES Geostationary Satellites. Since I’m waiting for more LNAs to arrive from China, I decided to play around with my stock Wi-Fi Grid Antenna and figure out what else I can do with it.

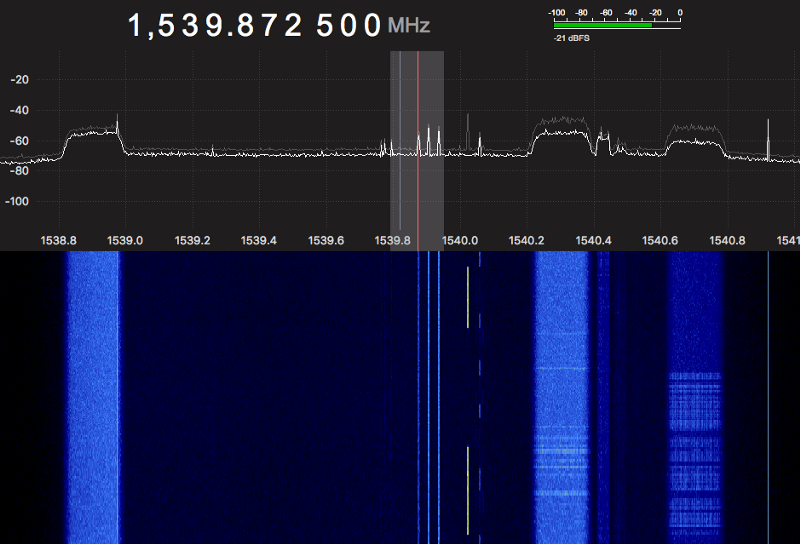
Although this is a 2.4Ghz antenna, the L-Band is close enough for a good SNR. Thus, I can receive almost every signal on the L-Band with this stock antenna, great! After some research, I found out that the Outernet is now using an L-Band signal, perfect! The only problem is that this signal is RHCP and these antennas are designed for Wi-Fi linear signals. Consequently, due to the distinct polarization, the Outernet signal will be heavily attenuated. Since this signal is pretty strong and designed to be received with small patch antennas, we shouldn’t have problems to get a decodable SNR with our unoptimized one-meter antenna.
Receiving the signal⌗
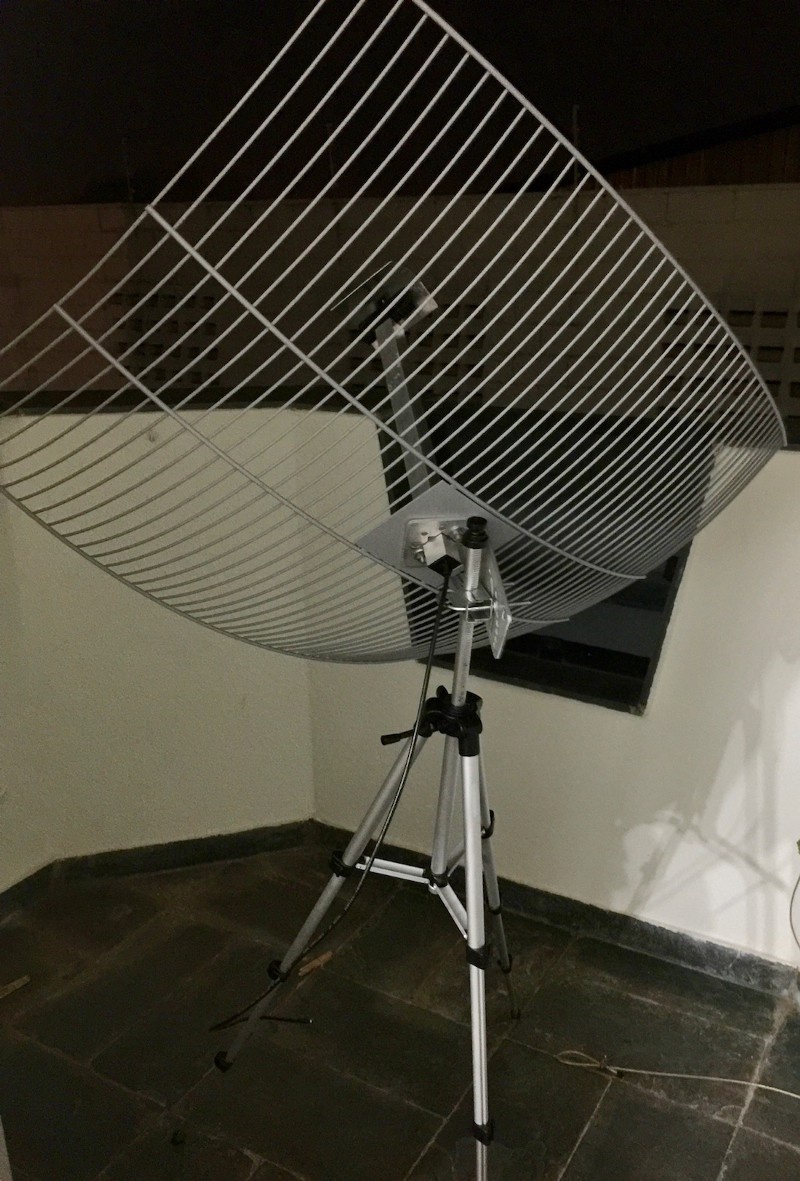
Parabolic Antennas are very directional, thus have to remain static for a successful demodulation. Here I used a cheap camera tripod, this isn’t the best solution but should work fine. Here in Americas, the Outernet signal is coming from Inmarsat 4-F3 which is located at 98W. For other locations, please refer to Outernet’s GitHub. I used SpyGlass iOS App and gpredict to help me position the antenna.
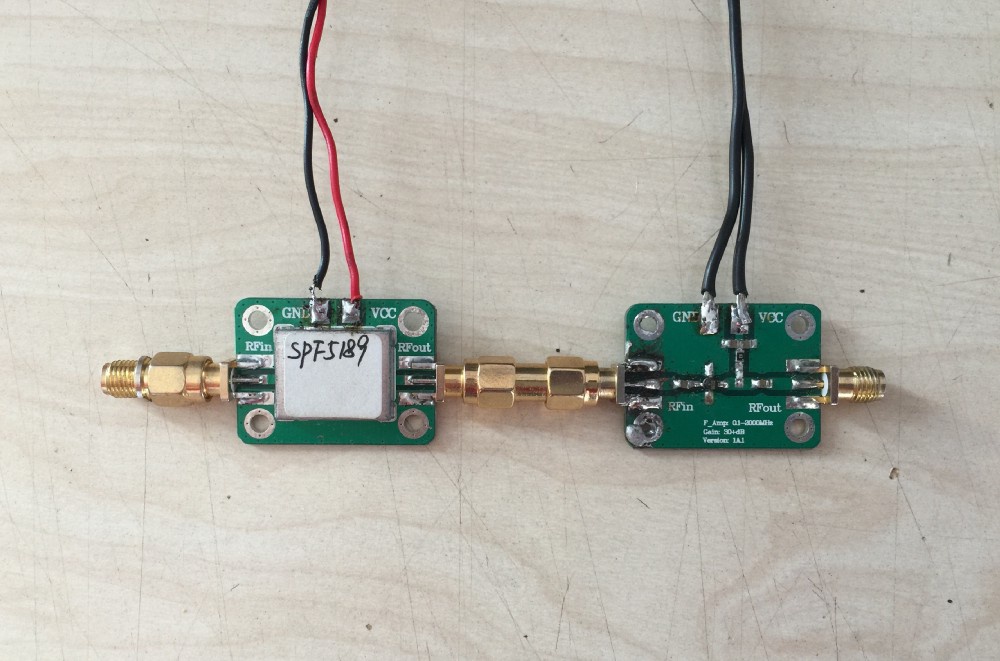
This signal is very faint, so it needs some amplification to be decodable, this is the perfect job for a Low Noise Amplifier. In this project, I used one SPF-5189 a low cost easy to find wide-band (50MHz-4000MHz) LNA which Lucas Teske recommended to me. And one crappy LNA from AliExpress that I don’t recommend, but in this case did the job. Another LNA that should work very well is the Adam’s LNA4ALL.
Finally, the signal is suitable to work with. Here I’ll use a generic RTL-SDR to keep the budget as low as possible. Please note that some generic RTL-SDR will have problems receiving the upper part of the L-Band particularly when they get hot. If you are planning to buy an RTL-SDR, I strongly recommend the ones from RTL-SDR Blog. They have TCXO and metal case that should help with shielding and thermal issues.

Demodulation⌗
The current Outernet solution for demodulating and displaying the files is the Skylark OS a Web Based UI that resembles an OS. The latest version is the 4.4 and can be installed in the Raspberry Pi or the C.H.I.P. computer.
The demodulation part is bad documented and doesn’t let you adjust the gain or add frequency correction, required for no-TCXO dongles like mine. Even if I could modify these settings, I’m skeptical about the ability of the software to keep up with the frequency deviation caused by the temperature fluctuations, thanks again no-TCXO crystal.
After some time, the guys from LeanDVB, a lightweight DVB-S Demodulator, published an article talking about how to demodulate the Outernet Signal with their software. Exactly what I needed!
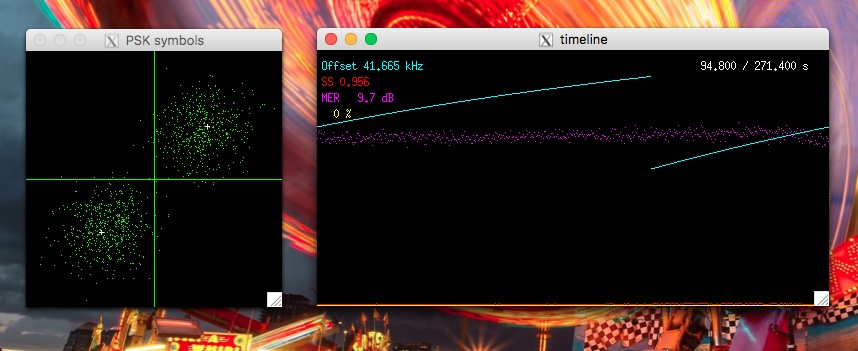
After installing everything on my laptop, I executed the software with GUI option enabled wait some seconds, and everything worked just fine. Once the LeanDVB locks into the signal, two circles will appear on the PSK symbols window and underscores will start to appear on the Terminal as valid HDLC frames start to being demodulated. Indications that everything is working as planned!
Some considerations when doing this:
- Some dongles have a higher frequency offset, so try to adjust the tune values from 38e3 to 42.4e3.
- Add the drift option if your dongle doesn’t have TCXO to compensate the frequency fluctuation over time.
- Adjusting the Frequency Offset (-p) is crucial. If you don’t already know this value, try following this tutorial.
$ rtl_sdr  -f 1539832500 -p 78 -s 960e3 -g 0 - |
$ ./leandvb -f 960e3 --anf 0 --tune 42e3 --const BPSK --drift  --sr 4200  --roll-off 0.2  --sampler rrc --rrc-rej 5  --viterbi  --fastlock  --hdlc  --packetized  -v  -d  --gui  > /tmp/hdlcframes.bin
Deployment & Decoding⌗
Since this signal is narrow and has Viterbi error correction the amount of incoming data is tiny. To make it worse, for the most of the day the data being transmitted will remain the same. Therefore, the next step is to unload this from my main computer and leave it running remotely from a C.H.I.P. or a Raspberry Pi. The installation images and instructions are available here. If you encounter any problem, please refer to the Outernet Forum or leave a comment here.
Compiling anything inside the Skylark OS is pretty annoying, so I compiled the LeanDVB on my Raspberry Pi running Raspbian Lite and transferred the binary files to /mnt/downloads folder on my Outernet via the built-in FTP Server. All passwords and usernames by default are “outernet”. You can also download the files I compiled here.
Once the binary files were in place, I connected my laptop the open Wi-Fi Hotspot created by the Skylark OS called “Outernet” and SSH into the device with the default username and password “outernet”. To execute the binaries, I need to fix the permissions as well as disable the default demodulator using the following commands:
$ sudo chmod u+x ./**
$ sudo chmod u+x ./librtlsdr/build/src/**
$ /etc/init.d/S90sdr stop
Finally, I just need to run the custom LeanDVB demodulator that I tested earlier on my laptop. This command will pipe the HDLC packets directly to the original Skylark OS decoder and provide the final files. Please note that this version has a lower Sample Rate to improve the CPU usage.
$ ./rtl_sdr  -f 1539832500 -p 78  -s 300e3  -g 0  -  | \
$ ./../../../leandvb.embedded  -f 300e3  --anf 0  --tune 42e3  --const BPSK --drift --sr 4200  --roll-off 0.2  --sampler rrc --rrc-rej 5  --viterbi  --fastlock  --hdlc  --packetized  -v  -d  | \
$ ./uncat /var/run/ondd.data
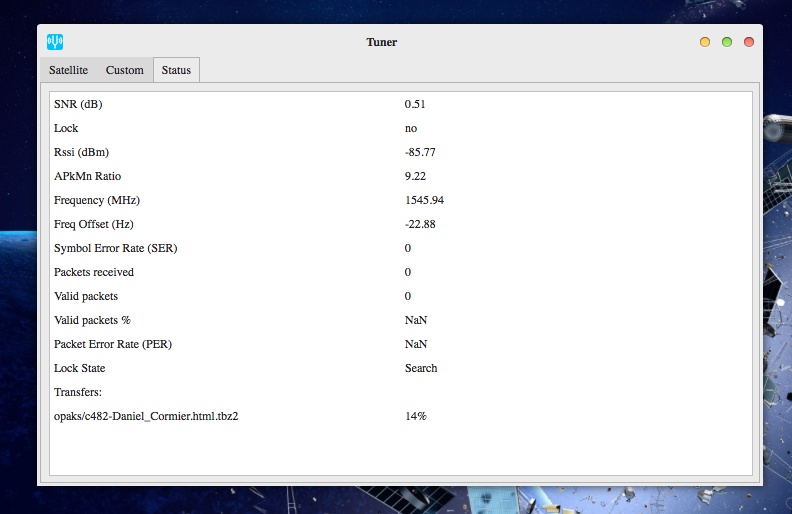
Once the demodulator is up and running, the files received should appear in the Apps available on the WebUI that can be accessed by browsing to any domain while connected on the same network. The name of the current file being downloaded should appear on the Status tab of the Tuner app.
Products & Conclusion⌗
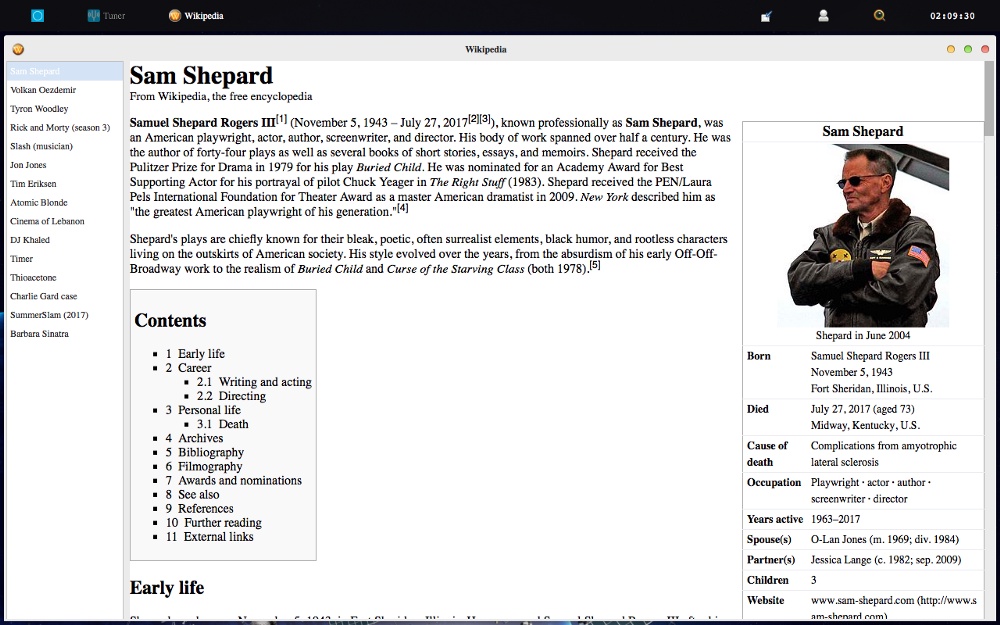
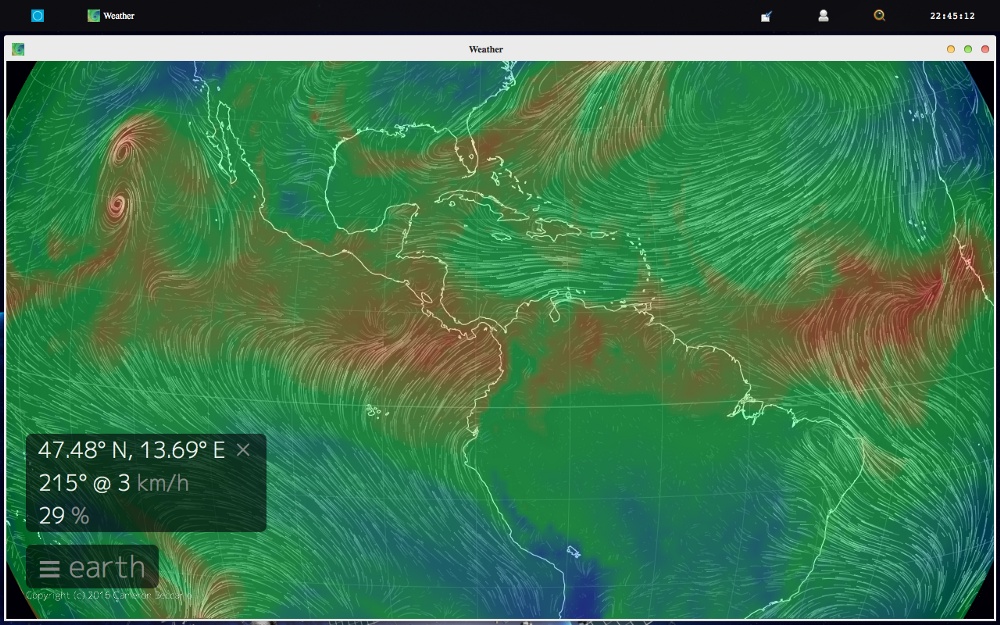
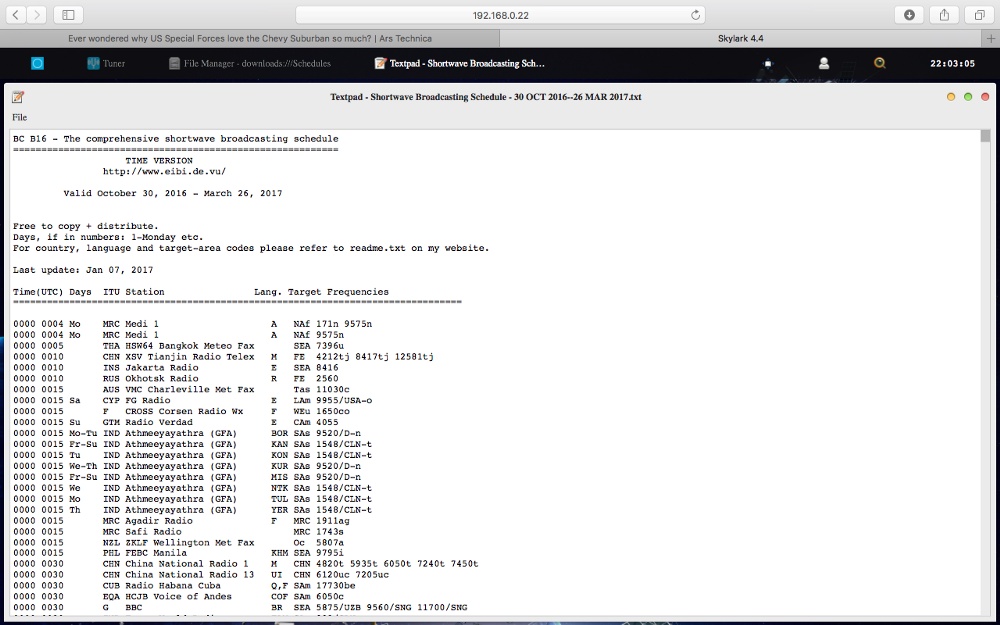
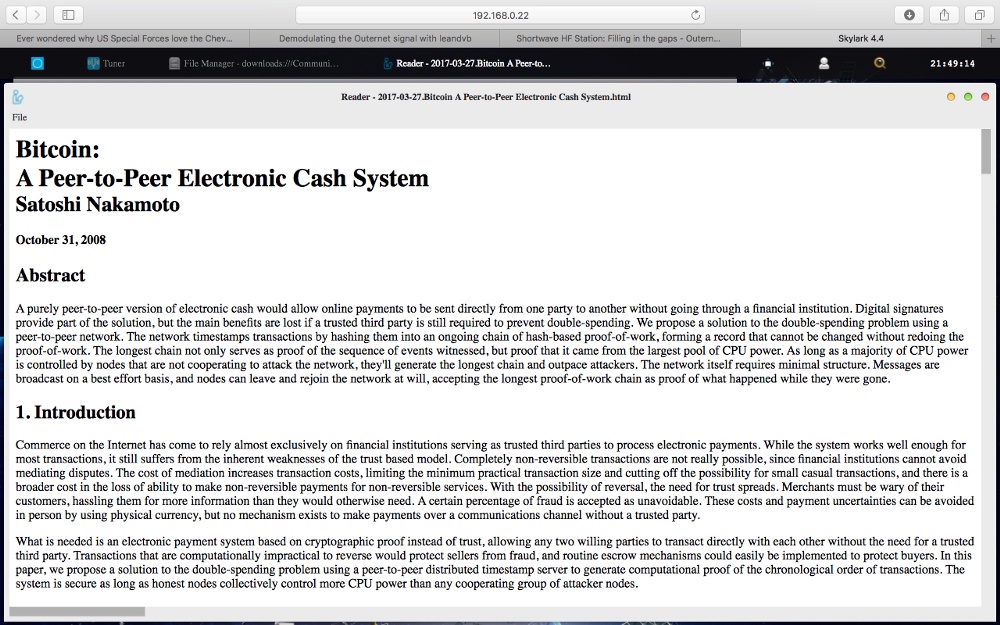
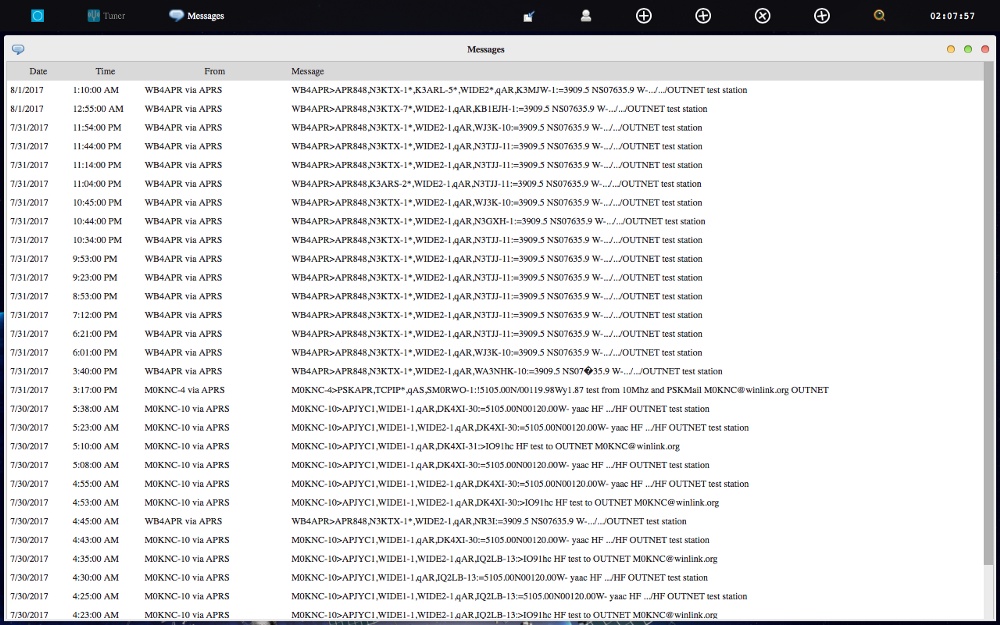
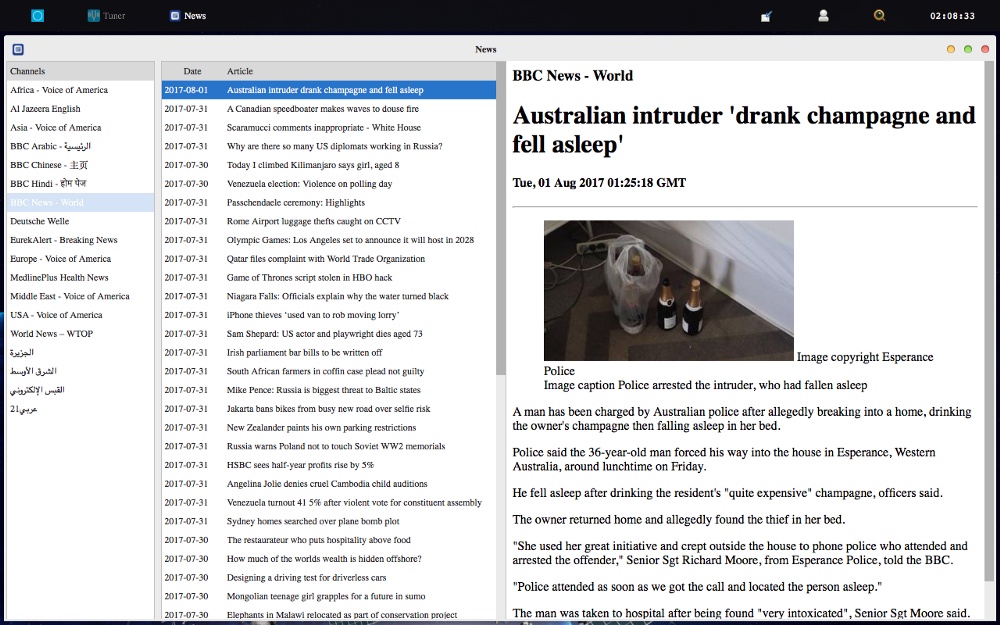
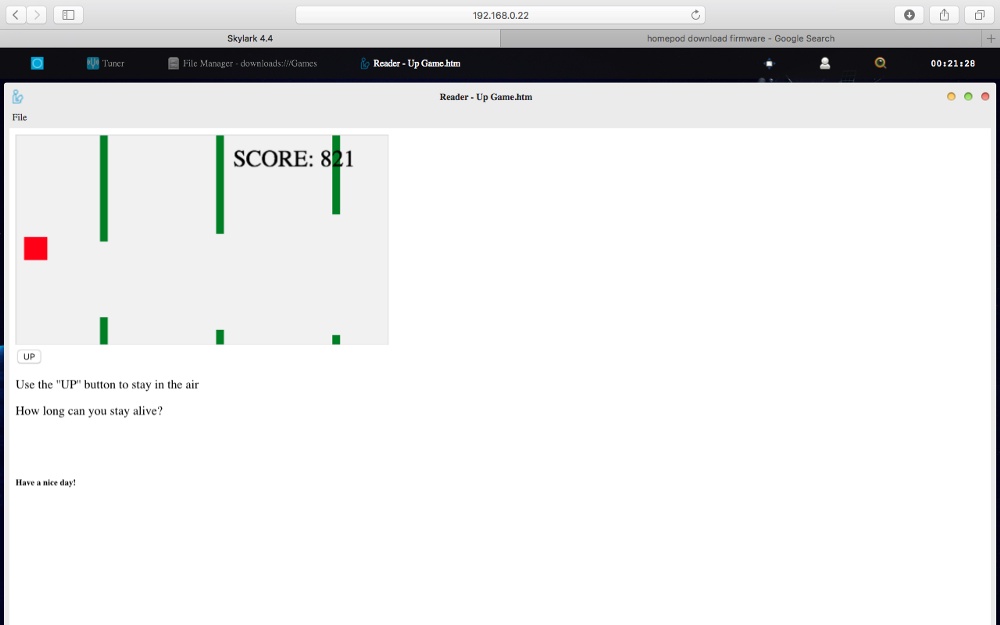
I ran this setup for ~25 hours and got a bunch of data. They are all available here for download. Don’t forget to follow me on Twitter to receive my latest projects! Some screenshots of the files received: